This chapter contains the following topics:
QTD/YTD Time Worked Report (by State)
QTD/YTD Time Worked Report (by City)
Employee Deductions/Earnings Report
Use the Employee/Employer Reports selection to print the Check Register History Report, Union Deductions Report, QTD/YTD Time Worked Report (by State or City), Workers’ Compensation Report, 401(K) Contributions Report, Employee Deductions/Earnings Report, Meals Expense Report and Form 941, Employer’s Quarterly Federal Tax Return Form.
This report will print a register of employee checks by employee number.
Pay information included on this report is the employee’s number and name, the check type, check date, pay period date, the check gross, total tax amount taken from the check, total amount of deductions taken from the check, the employee’s net pay and tips/meals amount.
A subtotal is printed for each employee showing total gross pay, total taxes, total deductions, and total tips/meals amount.
When you are using the electronic payment method of direct deposit, it prints a transaction number. Also, direct deposit transactions are indicated by a "T" next to the transaction number. A payment to an employee can be split between a check and a direct deposit transaction. Split pay are indicated with an "*" next to the check number. There is no transaction number for a split payment.
Grand totals are printed for the range of checks printed on the report.
See a Payroll Register History report example in the Form and Report Examples appendix.
Select
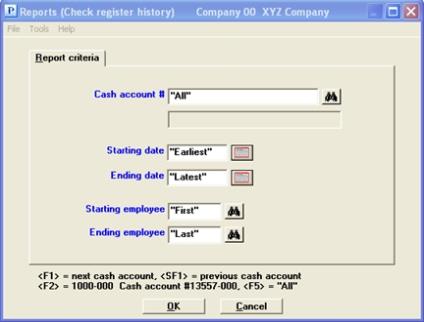
Check register history from the Reports, Employee/Employer menu.
Graphical Mode
A screen similar to this will be displayed:
Character Mode
A screen similar to this will be displayed:
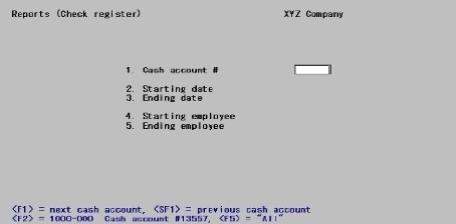
Enter the following information.
Options
Enter the cash account you wish to print this report for or use one of the options.
|
<F1> |
To scroll forward through the cash accounts |
|
<SFI> |
To scroll backward through the cash accounts |
|
<F2> |
To list the default cash account specified in Control information |
|
<F5> |
To include checks for all cash accounts |
|
Format |
Your standard account number format, as defined in Company information |
|
Example |
Press <F2> for the default cash account |
Enter the starting check date for the range of checks you wish to include in this report or use the option.
|
<F2> |
For Earliest |
|
Format |
MMDDYY |
|
Example |
Press <F2> for the Earliest check date you wish to print |
Enter the ending check date for the range of checks you wish to include in this report or use one of the options.
|
<F2> |
For Latest |
|
<Enter> |
For the same date as the starting date |
|
Format |
MMDDYY |
|
Example |
Press <F2> for the Latest check date you wish to print |
Enter the employee number of the first employee you wish to print on this report or use the option.
|
<F2> |
For first employee |
|
Format |
999999 |
|
Example |
Press <F2> for the First employee |
Enter the number of the last employee you wish to print on this report or use one of the options.
|
<F2> |
For last employee |
|
<Enter> |
For the same employee number as the starting employee |
|
Format |
999999 |
|
Example |
Press <F2> for the Last employee |
Make any desired changes and then select OK or press <Enter> to print the report.
This report shows union deductions by employee for a selected union deduction account number (or all union deduction account numbers), and for a selected pay period (or all pay periods). The report can be used internally by payroll personnel and can also be submitted to the unions, along with remittance of the amount deducted.
Note that this report uses information in Payroll History. Information for certain periods is no longer available if Payroll History is purged for those periods.
The Union Deductions Report includes the employee’s social security number, employee name, hours worked (regular, overtime, and special), subject pay (pay subject to union deductions), the method used to calculate the union deduction (per hour deduction, percentage of gross pay, or fixed amount per pay period), and the amount of union deduction per employee. Union totals are printed on the report.
Only the last 4 digits print of the social security number print on the report. The first five digits are replaced with asterisks.
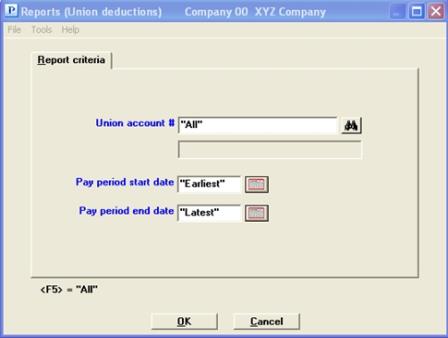
Select
Union deductions from the Reports, Employee/Employer menu.
Graphical Mode
Character Mode
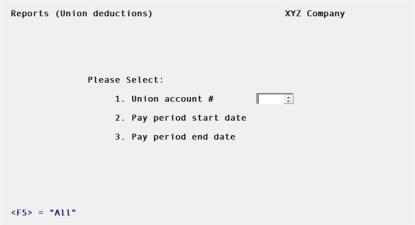
Enter the following information:
Union account merely means one of the accounts entered in the Union deduction field of Employees.
Options
Enter the number of the account for which the Union Deductions report is produced, or use the option:
|
<F5> |
For All union accounts |
The description of the union account is displayed after you enter the account number.
|
Format |
Your standard account number format, as defined in Company information |
|
Example |
Press <F5> |
Options
Enter the starting date of the first pay period for which the Union Deductions report is to be produced, or use the option:
|
<F2> |
For Earliest |
|
Format |
MMDDYY |
|
Example |
Type 30115 |
Options
Enter the ending date of the last pay period for which the Union Deductions Report is produced, or use the option:
|
<F2> |
For Latest |
|
Format |
MMDDYY |
|
Example |
Type 31415 |
Make any needed changes. Select OK or press <Enter> to print the report.
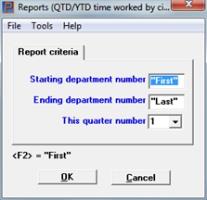
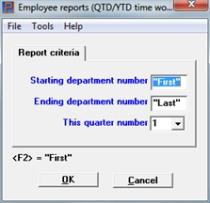
This report shows the hours and pay for each employee, with quarter-to-date and year-to-date totals. Each type of hours (regular, overtime, special, sick, vacation, and holiday) and of pay (vacation, holiday, and sick) is shown separately. There is a separate entry for each employee, in sequence by employee number within department, with totals and averages for each department.
State is shown for each employee. This is the first two characters of the employee’s state tax code. Multi-state information if any is not shown, nor are there any totals by state.
Select
QTD/YTD time worked (by state) from the Reports, General menu.
The following screen displays:
Graphical Mode
Character Mode
Enter the following information:
Ending department #
Options
Enter the range of department numbers to include in the QTD / YTD Time Worked Report, or use the option:
|
<F2> |
"First" starting department or "Last" ending department number |
|
Format |
9999 at each field |
|
Example |
Press <F2> |
Enter the number of the quarter which the report is to be printed.
|
Format |
One digit from 1 through 4 |
|
Example |
Type 1 |
Select OK to print the report or Cancel to return to the menu without printing.
Character Mode
Any change?
Answer Y to re-enter the screen, or N to print the report.
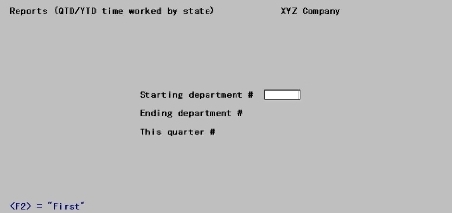
This report is identical to the preceding except that the city (the first two characters of the employee’s city tax code) is shown for each employee in addition to the state.
Select
QTD/YTD time worked (by city) from the Reports, General menu.
The following screen displays:
Graphical Mode
Character Mode
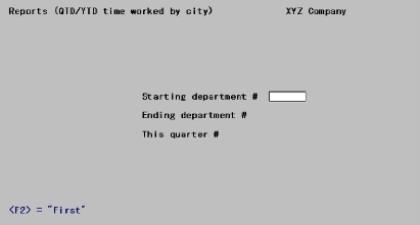
Enter the following information:
Ending department #
Options
Enter the range of department numbers to include, or use the option:
|
<F2> |
"First" starting department or "Last" ending department number |
|
Format |
9999 at each field |
|
Example |
Press <F2> |
Enter the number of the quarter for which the report is to print.
|
Format |
One digit from 1 through 4 |
|
Example |
Type 1 |
Select OK to print the report or Cancel to return to the menu without printing.
Character Mode
Any change?
Answer Y to re-enter the screen, or N to print the report.
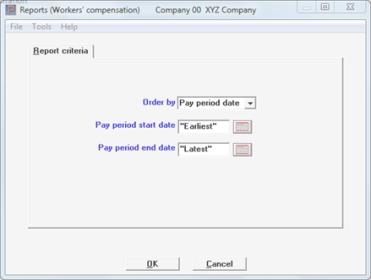
This report shows estimated workers’ compensation premiums for either a range of pay period dates or check dates. The report is printed by workers’ compensation code so that estimated premiums for one type of work are shown together. For security purposes only the last 4 digits print of the social security number print on the report. The first five digits are replaced with asterisks.
Select
Workers’ compensation from the Reports, Employee/Employer menu.
Graphical Mode
The following screen displays:
Character Mode
The following screen displays:
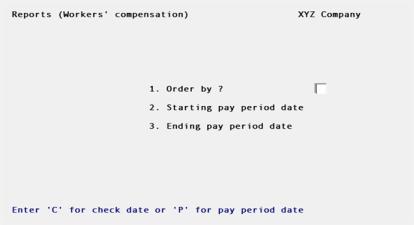
Enter the following information:
You may print the report by these date types:
| Character | Graphical | Description |
|---|---|---|
| C | Check date | Print by check date |
| P | Pay period date | Print by pay period date |
Ending pay period date
Or
Check start date and
Check end date
Options
Enter the date range of the dates for which the Workers’ Compensation Premium Report is to print, or use the option:
|
<F2> |
For "Earliest" starting date or "Latest" ending date |
|
Format |
MMDDYY at each field |
|
Example |
Press <F2> at each field |
Make any desired changes and then select OK or press <Enter> to print the report.
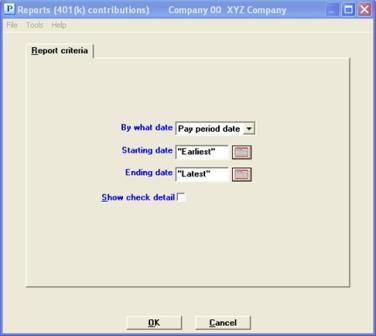
This report shows employee regular, Roth and employer contributions to 401(k) plans.
For security purposes only the last 4 digits print of the social security number print on the report. The first five digits are replaced with asterisks.
See a 401(k) Contributions report example, without check detail, in the Form and Report Examples appendix.
Select
401(k) contributions from the Reports, Employee/Employer menu.
Graphical Mode
The following screen displays:
Character Mode
The following screen displays:
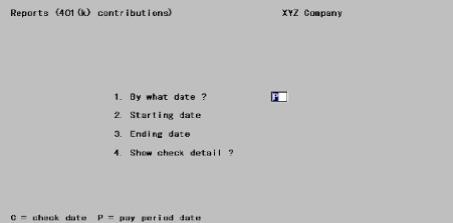
Enter the following information:
You can have the report print in either Pay period date (P) order or Check date (C) order. The starting and ending dates that you enter below refer to the type of date you choose here.
|
Format |
Graphical: Drop down list, either Pay period date or Check date. The default is Pay period date Character: One letter, either P or C. The default is P. |
|
Example |
Press <Enter> |
Ending date
Options
Enter the date range for which the 401(k) Contributions Report is to print, or use the option:
|
<F2> |
For Earliest starting date or Latest ending date |
|
Format |
MMDDYY at each field |
|
Example |
Type 30115 as the starting date and 33115 as the ending date |
Answer Y to see 401(k) contributions for each check within the date range and by the date type (Pay period or Check). Answer N to see 401(k) contributions within the date range and by date type summarized by employee.
|
Format |
Graphical: Checked is yes and unchecked is no. The default is unchecked Character: One letter, either Y or N. The default is N. |
|
Example |
Press <Enter> |
Make any desired changes and then select OK or press <Enter> to print the report.
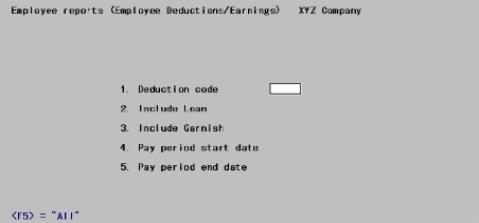
This report shows total employee deductions and earnings for a specified pay period.
This report does not include deduction amounts for 401(k) and union.
Select
Deductions/Earnings, Employee from the Reports, Employee/Employer menu.
Graphical Mode
The following screen displays:

Character Mode
The following screen displays:
Enter the following information:
Options
Enter the deduction code. This must be on file in Deductions / earnings. You can also use the option:
|
<F5> |
For All deduction codes |
|
Format |
Three characters |
|
Example |
Press <F5> |
Check the box for yes (Enter Y) or unchecked for no (N).
|
Format |
Graphical: Checked is yes and unchecked is no. The default is unchecked Character: One letter, either Y or N |
|
Example |
Type Y to include loans |
Check the box for yes (enter Y) or leave it unchecked for no (N).
|
Format |
Graphical: Checked is yes and unchecked is no. The default is unchecked Character: One letter, either Y or N |
|
Example |
Type Y to include garnishments |
Pay period end date
Options
Enter the range of pay period ending dates to be included in the report, or use the option:
|
<F2> |
For the Earliest or Latest date |
|
Format |
MMDDYY at each field |
|
Example |
Enter a range of 10115 through 13115 |
Make any desired changes and then select OK or press <Enter> to print the report.
This report helps you to prepare a 941 Quarterly Report and a 941 Schedule B. The 941 form is the Employer's Quarterly Federal Tax Return. The instructions for filling out the 941 form are available online from IRS: http://www.irs.gov
There is an option to export data that can be opened into a PDF form of the 941.
The address that prints on the report and gets generated in the PDF merge file comes from Payroll Control information. In the case of the PDF merge file address line 3 is NOT used because the form only provides for 2 address lines. So, you should put city, state and zip in address line 2. See the address fields in Control Information.
Select
941 Prep. Report from the Reports, General menu.
This report allows you to prepare a 941 Quarterly report and 941 Schedule B. The design of this report is to reference the input fields from the report creation screen to the fields in the report and the 941 form.
Enter the following information:
Which Quarter ?
Enter the quarter of the year on which you are reporting. The year is the same as entered in PR Control information.
Are wages, tips and other compensation subject
|
|
to social security or Medicare tax (line 4) |
Normally you should accept the default of Y. If you only have contract employees who never have Social Security or Medicare withheld, and do not have Federal income tax withheld then enter N.
Section 3121(q) Notice and Demand (line 5f)
|
Note |
See the IRS 941 instructions for how to enter this field and other fields up to the Total deposits and prior qrtr ovrpayments field. |
Current qrtr fractions of cents adj. (line 7)
Current qrtr sick pay adj. (line 8)
Current qrtr tips and group term adj. (line 9)
Qualified small bus. tac credit (line11)
Total deposits and prior qrtr ovrpayments (line 13)
Enter Y to create a form that merges with a 941 PDF. It merges PDF data with an xml form of the 941 data. Not all data is merged into the PDF file. You must enter the remaining data in the PDF, as needed.
The location of the form is in the PDFFORMS folder located under the top-level PBS.
If you select N, the next two fields are skipped and you can only print the report.
Whether you select Y or N, you must print the report regardless.
|
Note |
Each year the 941 form changes, even if the only change is the year at the top of the form. The PDF form, provided by PSI, was originally provided by IRS. Check with IRS web site to verify that you have the latest version. Here is a location where the form may be found: http://www.irs.gov/uac/Forms,-Publications,-and-Other-Tax-Products If the form changes, the program printing this report will likely need to change as well. Look for an update from PBS. |
Name of PDF form to be merged
This field is skipped if you selected N to Create 941 PDF merged form ?
This is the name of the PDF file. It is recommended that you use the default of f941.
Name of xpd to be merged
This field is skipped if you selected N to Create 941 PDF merged form ?
This is the name of the xml file that contains the data to be merged into the PDF file.
You may use the default file name, which is f941_data. However, you may want to change the file name to reflect the company, year and quarter. You may enter up to 20 characters. Here is an example:
XYZCompany-2017-1
The file gets generated as the last step of printing this report. See Open the XDP File and Edit
Filing Schedule B (Form 941) this quarter ?
Selecting Y for this field prints a second page with the 941 Schedule B information. This may be used if you are a Semiweekly Schedule Depositor. See the Form 941 Schedule B IRS instructions to see if this applies to you.
|
Note |
The data for Schedule B is printing from Payroll history. The data for the standard Form 941 report is from Quarter-to-date history. Due to rounding, the Quarter tax liability total on the Schedule B may not match line 10 on the Form 941. When this happens, this message displays on the screen: Form 941 Schedule B total liability for the quarter does not equal line 10 for Form 941. Also, near the bottom of Schedule B, you will see something like this printed: Form 941 Schedule B total liability for the quarter exceeds Form 941 line 10 by $0.02. The difference should be minor. To make them the same, you may enter the difference in Current qrtr fractions of cents adj. (line 7). See the IRS 941 instructions for entering this field. |
Any change ?
Enter Y to make changes or press <Enter> to accept the default of N to continue.
The Company address comes from Payroll Control information.
The Printer selection screen will display. Choose to print the 941 Preparation Report to a Company information printer, Windows printer, Print to disk or Display on the screen.
When the program finishes printing or displaying the report data, the xdp file is generated. A message displays letting you know that the file has been created and the name of the file.
In order to open the xdp file, you must navigate to the PDFFORMS folder in the top-level PBS. The xdp file is located there. If you have a previous xdp file open from another quarter, close it before you open the new generated version. If you do not, you run the risk of merging data from 2 quarters.
Open the xdp file by double-clicking on it. Add and edit data as needed. After editing the data, you may save the PDF file with a different name. Enter a PDF file name to reflect the Name of the company, Year and Quarter . Here is an example:
XYZCompany-2017-1.PDF
You should be using the latest version of Adobe Reader or Adobe Pro. Older versions may also work, but are not recommended as you could encounter error (older version) messages.
When opening the xdp data into the PDF form, the data may not display because of Acrobat security. Instead, this message displays: Data from this site is blocked to avoid potential security risks. Click Options to receive this data if you trust this document. If it does, select Options and select to Trust this document always.
On a Linux system, to open the file, copy or move it to a Windows workstation (with Acrobat installed).
|
Note |
Before you submit to IRS, you must verify that the data on the form is correct. You must enter any additional required data that is missing on the form. |
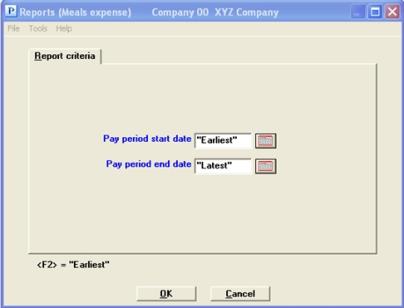
This report is designed to help you in posting meals expenses to the general ledger. It shows meals expense, by employee, for either a selection of pay periods or for all pay periods. If meals and tips are not selected for use in Control information, skip this section.
Meal expenses may be taxable or not taxable, as specified in the meals type, earning code records. This report provides a concise summary of the meal expense amounts entered and posted for time transactions.
Depending on your company policy, meal expenses may or may not be reimbursed to each affected employee. If you do reimburse your employees for their meal expenses, you could use this report for this purpose by printing it after each run of payroll checks is posted.
Select
Meals expense from the Reports, Employee/Employer menu.
Graphical Mode
The following screen displays:
Character Mode
The following screen displays:

Enter the following information:
Pay period end date
Options
Enter the date range of pay periods for which the Meals Expense Report is to print, or use the option.
|
<F2> |
For the Earliest starting date or Latest ending date |
|
Format |
MMDDYY at each field |
|
Example |
Type 70415 as the starting date and 71815 as the ending date |
Make any desired changes and then select OK or press <Enter> to print the report.